Warm, spiced, and naturally sweetened, this homemade apple pie filling brings all the cozy flavors of fall into one simple, comforting recipe. Made with fresh apples, maple syrup, and a dash of cinnamon, I love using it in traditional pies, layering it in crisps, or even spooning it over my morning oatmeal or pancakes. It’s versatile, delicious, and made entirely from scratch—without any artificial ingredients.
Ingredients
(Tip: You’ll find the full list of ingredients and measurements in the recipe card below.)
6 medium apples (such as Granny Smith or Honeycrisp), peeled, cored, and sliced
1 tablespoon lemon juice
1/2 cup pure maple syrup (or sub brown sugar)
1/4 cup water
2 tablespoons cornstarch
1 teaspoon ground cinnamon
1/4 teaspoon ground nutmeg
Pinch of salt
1 teaspoon pure vanilla extract
Directions
I start by tossing the sliced apples with lemon juice in a large bowl to keep them from browning.
Then, in a large saucepan over medium heat, I combine the maple syrup, 3 tablespoons of water, cinnamon, nutmeg, and salt. I stir everything together to blend the flavors.
In a separate small bowl, I mix the remaining tablespoon of water with the cornstarch until smooth.
I add the apples to the saucepan and cook them for 5–7 minutes, stirring occasionally, until they start to soften.
Next, I stir in the cornstarch slurry and continue cooking for 3–5 more minutes until the mixture thickens and the apples are tender.
Finally, I remove the pan from the heat and stir in the vanilla extract.
I let the filling cool before using it in a pie or transferring it to jars for storage.
Servings and Timing
Servings: 6
Prep Time: 10 minutes
Cook Time: 12 minutes
Total Time: 22 minutes
Calories: Approximately 120 kcal per serving
Variations
Sweeter Version: I sometimes use brown sugar instead of maple syrup for a richer, caramel-like sweetness.
Spice It Up: When I want a spicier kick, I add ground cloves or allspice.
Apple Varieties: Mixing apple types (like Granny Smith with Fuji or Honeycrisp) gives the filling more depth.
Boozy Twist: For a grown-up version, I stir in a tablespoon of bourbon at the end.
Chunky or Smooth: I chop apples smaller for a smoother filling, or leave them chunky for a more rustic texture.
Storage/Reheating
I store the cooled filling in an airtight container or jar in the refrigerator for up to 5 days. For longer storage, I freeze it in freezer-safe bags for up to 3 months. When I’m ready to use it, I thaw it in the fridge overnight and warm it on the stove over low heat, adding a splash of water if needed to loosen the consistency.
FAQs
How do I thicken apple pie filling naturally?
I use cornstarch in this recipe, but arrowroot or tapioca starch also work well as natural thickeners.
Can I make this filling ahead of time?
Yes, I often make it a few days in advance. It holds up well in the fridge and the flavor deepens over time.
Can I use canned apples instead of fresh?
Fresh apples give the best texture and flavor, but canned apples can work in a pinch—just be sure to drain them well.
Is this filling suitable for freezing?
Absolutely. I freeze it flat in zip-top bags for easy storage and quick thawing.
What’s the best type of apple for pie filling?
I love using a mix of tart and sweet apples—Granny Smith for structure and Honeycrisp or Fuji for sweetness.
Conclusion
This homemade apple pie filling is a staple in my fall kitchen, but honestly, I use it all year round. It’s simple to make, naturally sweetened, and full of comforting flavors that work in so many desserts—or even breakfast dishes. Whether I’m baking a classic pie or just spooning it over pancakes, this filling never disappoints.
Recipe:
Print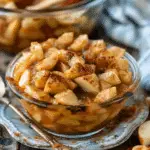
Apple Pie Filling
5 Stars 4 Stars 3 Stars 2 Stars 1 Star
No reviews
- Author: Sophia
- Total Time: 22 minutes
- Yield: 6 servings
- Diet: Vegan
Description
Warm, spiced, and naturally sweetened, this homemade apple pie filling is perfect for pies, crisps, pancakes, or oatmeal. Made with fresh apples, maple syrup, and cozy spices, it’s a versatile, refined sugar-free filling made completely from scratch.
Ingredients
6 medium apples (such as Granny Smith or Honeycrisp), peeled, cored, and sliced
1 tablespoon lemon juice
1/2 cup pure maple syrup (or sub brown sugar)
1/4 cup water
2 tablespoons cornstarch
1 teaspoon ground cinnamon
1/4 teaspoon ground nutmeg
Pinch of salt
1 teaspoon pure vanilla extract
Instructions
- In a large bowl, toss the sliced apples with lemon juice to prevent browning.
- In a large saucepan over medium heat, combine maple syrup, 3 tablespoons of water, cinnamon, nutmeg, and salt. Stir to blend the flavors.
- In a small bowl, whisk the remaining 1 tablespoon of water with cornstarch until smooth.
- Add the apples to the saucepan and cook for 5–7 minutes, stirring occasionally, until they begin to soften.
- Stir in the cornstarch slurry and cook for another 3–5 minutes until the mixture thickens and the apples are tender.
- Remove from heat and stir in the vanilla extract.
- Let the filling cool before using in pies or storing in jars.
Notes
Use a mix of apple varieties for deeper flavor.
Substitute arrowroot or tapioca starch if avoiding cornstarch.
Add a tablespoon of bourbon for a boozy twist.
Adjust apple chop size for chunkier or smoother texture.
Store in the refrigerator for up to 5 days or freeze for up to 3 months.
- Prep Time: 10 minutes
- Cook Time: 12 minutes
- Category: Dessert
- Method: Stovetop
- Cuisine: American
Nutrition
- Serving Size: 1/6 of recipe
- Calories: 120
- Sugar: 22g
- Sodium: 20mg
- Fat: 0g
- Saturated Fat: 0g
- Unsaturated Fat: 0g
- Trans Fat: 0g
- Carbohydrates: 31g
- Fiber: 3g
- Protein: 0g
- Cholesterol: 0mg

