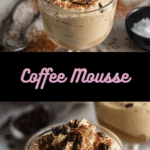
Light, airy, and deeply infused with espresso flavor, this no-bake coffee mousse is a creamy treat I love serving when I want something indulgent but easy. With just a handful of ingredients and no oven time, it’s a deliciously simple dessert perfect for coffee lovers like me.
Ingredients
(Tip: You’ll find the full list of ingredients and measurements in the recipe card below.)
1 tablespoon instant espresso powder
2 tablespoons hot water
1/4 cup maple syrup or agave
1 teaspoon pure vanilla extract
1/8 teaspoon salt
1 1/2 cups full-fat coconut cream (from a chilled can of coconut milk)
Optional: 1 tablespoon cocoa powder or melted dark chocolate for mocha flavor
Optional toppings: shaved chocolate, coffee beans, whipped cream
Directions
I start by dissolving the espresso powder in hot water, then let it cool just slightly.
Next, I scoop only the solid coconut cream from a chilled can — skipping the watery part — and beat it until smooth and fluffy.
I stir in the dissolved espresso, maple syrup, vanilla, salt, and cocoa or chocolate if I’m going for a mocha flavor.
After beating everything together until light and creamy, I spoon the mousse into serving dishes.
I refrigerate it for at least 2 hours so it firms up nicely.
Just before serving, I might add shaved chocolate, a few coffee beans, or a swirl of whipped cream on top.
Servings and timing
This recipe makes 4 servings. It takes 10 minutes of prep time and requires at least 2 hours of chilling in the fridge for the best texture. Total time comes to about 2 hours and 10 minutes. Each serving contains approximately 210 kcal.
Variations
Mocha Mousse: I sometimes mix in cocoa powder or melted dark chocolate for a deeper, mocha-like flavor.
Sweetener Swap: I use maple syrup or agave, but other liquid sweeteners like date syrup or honey (if not strictly vegan) also work.
Spiced Version: Adding a pinch of cinnamon or cardamom gives the mousse a warm twist.
Boozy Treat: For a grown-up dessert, I occasionally add a splash of coffee liqueur or dark rum.
Storage/Reheating
I store the mousse in the fridge, covered, for up to 3 days. It stays creamy and holds its shape well. I don’t recommend freezing it, as the texture tends to separate once thawed. Since it’s a chilled dessert, there’s no need for reheating.
FAQs
How do I get the best coconut cream from a can?
I always chill the can of full-fat coconut milk overnight and scoop out only the thick cream that rises to the top. The watery part at the bottom can be saved for smoothies or other recipes.
Can I make this mousse ahead of time?
Yes, I often prepare it the night before. It actually sets even better after chilling overnight, making it perfect for planning ahead.
What can I use if I don’t have instant espresso powder?
If I’m out of espresso powder, I use instant coffee granules, but I make them stronger to match the flavor intensity. Brewed espresso can work too, but I reduce the liquid slightly to keep the mousse firm.
Is this mousse really dairy-free?
Absolutely. I use full-fat coconut cream instead of dairy, and the rest of the ingredients are naturally dairy-free, making it suitable for vegans and those with lactose intolerance.
Can I use an electric stand mixer instead of a hand mixer?
Yes, both work well. I usually grab whatever is handy, but the goal is to whip the coconut cream until fluffy before mixing in the remaining ingredients.
Conclusion
This coffee mousse is one of my favorite go-to desserts when I want something smooth, rich, and full of coffee flavor — without baking or complicated steps. With minimal ingredients and maximum flavor, it’s a dessert I return to time and time again. Whether I dress it up with toppings or enjoy it straight from the fridge, it always satisfies.
Recipe:
Print
Coffee Mousse
5 Stars 4 Stars 3 Stars 2 Stars 1 Star
No reviews
- Author: Sophia
- Total Time: 2 hours 10 minutes
- Yield: 4 servings
- Diet: Vegan
Description
A light and creamy vegan coffee mousse infused with rich espresso flavor. This no-bake dessert is dairy-free, naturally sweetened, and perfect for coffee lovers seeking an indulgent yet simple treat.
Ingredients
1 tablespoon instant espresso powder
2 tablespoons hot water
1/4 cup maple syrup or agave
1 teaspoon pure vanilla extract
1/8 teaspoon salt
1 1/2 cups full-fat coconut cream (from a chilled can of coconut milk)
Optional: 1 tablespoon cocoa powder or melted dark chocolate for mocha flavor
Optional toppings: shaved chocolate, coffee beans, whipped cream
Instructions
- Dissolve the instant espresso powder in the hot water and let it cool slightly.
- Scoop the solid coconut cream from a chilled can of full-fat coconut milk, avoiding the watery part.
- Beat the coconut cream with a hand mixer until smooth and fluffy.
- Add the dissolved espresso, maple syrup (or agave), vanilla extract, salt, and optional cocoa or melted chocolate for a mocha flavor.
- Continue to beat the mixture until light and creamy.
- Spoon the mousse into serving dishes.
- Refrigerate for at least 2 hours to allow the mousse to set.
- Before serving, optionally top with shaved chocolate, coffee beans, or whipped cream.
Notes
Chill the coconut milk overnight to separate the cream for best results.
Customize with cocoa or chocolate for a mocha variation.
Add spices like cinnamon or cardamom for a warm twist.
A splash of coffee liqueur or dark rum adds a boozy touch for adults.
Store in the fridge for up to 3 days; do not freeze.
- Prep Time: 10 minutes
- Cook Time: 0 minutes
- Category: Dessert
- Method: No-Bake
- Cuisine: American
Nutrition
- Serving Size: 1 serving
- Calories: 210
- Sugar: 12g
- Sodium: 60mg
- Fat: 18g
- Saturated Fat: 15g
- Unsaturated Fat: 3g
- Trans Fat: 0g
- Carbohydrates: 14g
- Fiber: 1g
- Protein: 1g
- Cholesterol: 0mg


